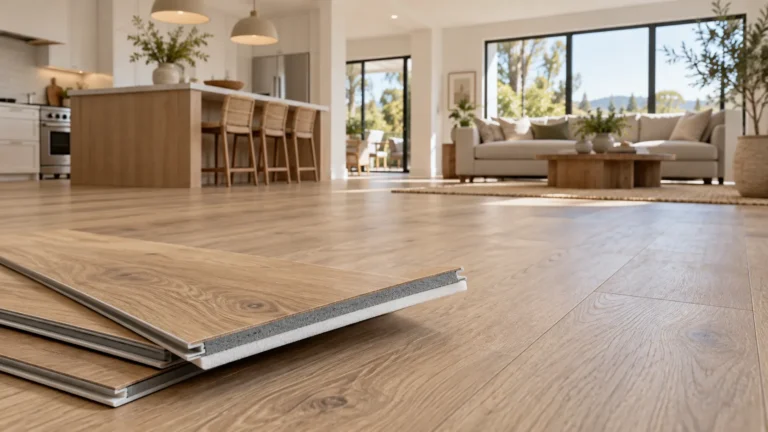
Learning how to install hardwood flooring comes down to doing the work in the right order. Check your flooring manufacturer’s installation instructions, prepare and moisture-test the subfloor, acclimate the boards if required, plan your layout and expansion gap, and then install the planks with the approved nail-down, staple-down, glue-down, or floating method.
The boards themselves are rarely the hard part. Most failed hardwood floors go wrong earlier, with a damp slab, an uneven subfloor, the wrong fastener, too little expansion space, or an installation method the manufacturer never approved for that product.
This guide walks you through every stage: what to check before the first plank goes down, how to install each type of hardwood floor, and when a DIY project is better handed to a flooring professional.
| Important: Hardwood specifications are product-specific. The installation guide that comes with your exact flooring always takes priority over the general figures in this article. |
How to Install Hardwood Flooring: Quick Steps
- Read your flooring’s installation instructions.
- Make sure the house is enclosed, dry, and running on its HVAC system.
- Remove furniture, trim, and old flooring.
- Inspect, repair, and flatten the subfloor.
- Moisture-test the subfloor and the flooring.
- Acclimate the boards if the manufacturer requires it.
- Choose the board direction (usually perpendicular to the floor joists).
- Snap a reference line and plan the first and last rows.
- Rack out boards from several cartons.
- Set the expansion gap with spacers.
- Undercut door jambs and casings.
- Install the boards using the approved method.
- Rip and fit the final row.
- Add transitions, reinstall trim, and inspect the floor.
- Each step is explained in detail below.
First, What Type of Hardwood Flooring Are You Installing?
Before you buy tools or pull up the old floor, identify how your new flooring is built. If you’re still choosing a product, our guide to the different types of wood flooring compares solid, engineered, and other wood options in detail.
Solid hardwood flooring is milled from a single piece of wood. Traditional 3/4-inch tongue-and-groove solid hardwood is usually nailed or stapled to a wood subfloor and is generally limited to on-grade or above-grade rooms.
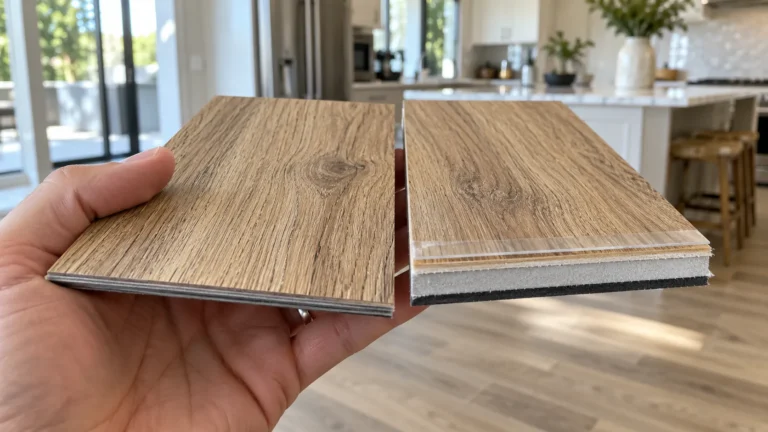
Engineered hardwood flooring has a real-wood surface layer bonded to a layered core. Depending on the product, it can be nailed, stapled, glued, or floated, and some engineered products are approved for concrete slabs and basements.
Construction and finish are separate choices. A floor can be solid and prefinished, solid and unfinished, engineered and prefinished, or engineered and unfinished. Prefinished means the factory has already sanded and coated the surface. Unfinished hardwood must be sanded and finished on site after installation.
Which installation method applies?
| Flooring situation | Common installation method |
| 3/4-inch solid hardwood over a wood subfloor | Nail-down or cleat-down |
| Approved engineered hardwood over a wood subfloor | Staple, nail, glue, or float |
| Approved engineered hardwood over concrete | Glue-down or floating |
| Click-lock engineered hardwood | Floating |
| Unfinished solid hardwood | Usually mechanically fastened, then sanded and finished |
These are common pairings, not universal rules. Confirm the approved methods on the installation sheet for your exact product.
How Much Hardwood Flooring Should You Buy?
Measure the length and width of each room and multiply them to get square footage. Split L-shaped or irregular rooms into rectangles, measure each one, and add the totals together. Include closets and any area under appliances that will be covered.
Then add a waste allowance for cuts, defects, and boards you’ll cull for color or character:
- 5 to 10 percent for a straight layout in simple, rectangular rooms.
- 10 percent or more for diagonal layouts, herringbone or chevron patterns, rooms with many cuts, or rustic grades with more natural defects. Hartco’s engineered installation guide, for example, uses 10 percent as its allowance for diagonal installs.
Example: A 12 x 15-foot bedroom is 180 square feet. With a 10 percent waste allowance, you need 198 square feet. If each carton covers 20 square feet, buy 10 cartons.
Buy all your flooring from the same production lot when possible, and keep one spare carton after the job. Matching boards for a future repair can be difficult once a style is discontinued.
Tools and Materials You’ll Need
You won’t need every flooring tool for every project. Start with the basics, then add equipment for your installation method.
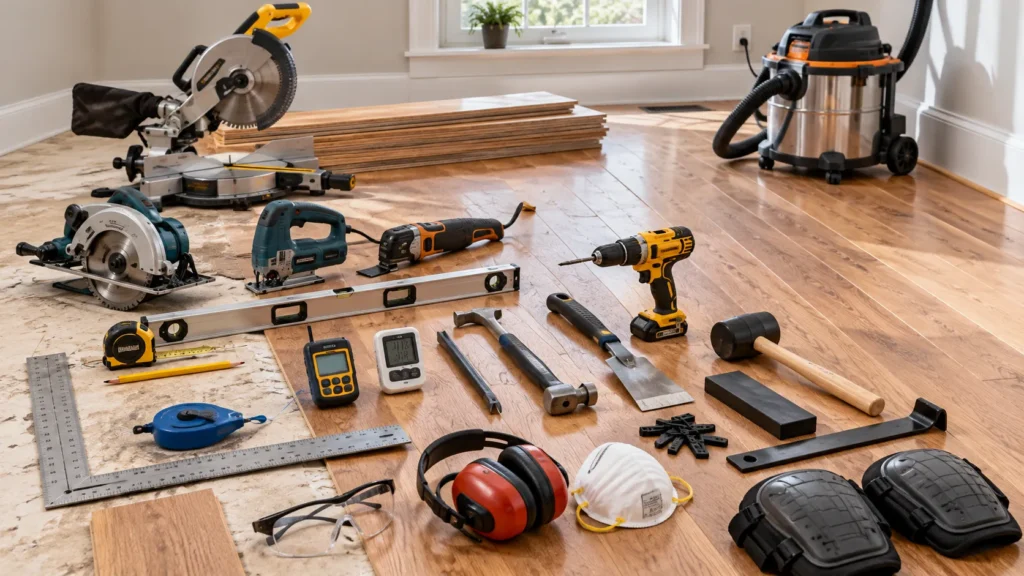
Basic tools
| Task | Tools |
| Measuring and layout | Tape measure, pencil, framing or combination square, chalk line or laser, 6- to 10-foot straightedge |
| Moisture and climate | Wood moisture meter, hygrometer (temperature and relative humidity) |
| Demolition and prep | Pry bar, flat bar, hammer, floor scraper, drill/driver, shop vacuum |
| Cutting | Miter saw, table saw or circular saw for ripping, jigsaw, oscillating multi-tool or jamb saw, utility knife |
| Installing | Rubber mallet, tapping block, pull bar, manufacturer-specified spacers, nail set |
| Safety | Safety glasses, hearing protection, knee pads, and an N95 mask or better respirator for cutting and sanding |
Method-specific equipment
For a nail-down floor, you’ll need a flooring cleat nailer, an air compressor and hose, and a finish nailer for the rows near the walls.
For a staple-down floor, use the flooring stapler and the staple gauge and length specified by the flooring manufacturer.
For a glue-down floor, you need the approved wood-flooring adhesive, the exact notched trowel the adhesive maker recommends, and a compatible adhesive remover.
For a floating floor, you need the approved underlayment or vapor-control layer, plus a tapping block and pull bar.
Materials checklist
- Hardwood flooring, including your waste allowance
- Underlayment or vapor retarder, if your product requires one
- Flooring cleats or staples in the specified gauge and length
- Finish nails for face-nailing and trim
- Adhesive (for glue-down or glue-assist installs) and the approved adhesive remover
- Color-matched wood putty or filler for face-nail holes
- Transitions, baseboard, and quarter-round or shoe molding
Don’t choose a staple, nail, or trowel just because it fits the rental equipment. Flooring thickness, species, and construction can all change the fastener or adhesive you need.
Step 1: Read the Flooring Installation Instructions
This is the step most people are tempted to skip, and it causes the most expensive mistakes. Before opening the cartons, find these details in your product’s installation guide:
- Approved subfloor types and grade levels (below, on, or above grade)
- Approved installation methods
- Moisture limits for the flooring, subfloor, and concrete
- Acclimation requirements and required indoor temperature and humidity
- Expansion-gap requirements
- Required underlayment or vapor retarder
- Fastener type, gauge, length, and spacing
- Approved adhesive and trowel
- Radiant-heat restrictions
- Maximum continuous run before a transition is needed
There is no universal “48-hour acclimation rule,” “1/4-inch expansion gap,” “2-inch nail,” or concrete moisture limit that applies to every hardwood floor. The manufacturer’s current instructions control those details.
Typical specs you’ll see (examples only)
To give you a realistic idea of the numbers involved, here are examples from published manufacturer guides and common industry practice. Use them to understand the scale, then confirm the figures for your own product.
| Specification | Typical example | Where it comes from |
| Expansion gap, 3/4-inch solid nail-down | About 1/2 to 3/4 inch | Common practice; Mullican nail-down guide discusses 3/4 inch for large or humid rooms |
| Expansion gap, floating floor | Equal to the flooring’s thickness | Mullican floating guide |
| Blind-nail spacing, 3/4-inch solid strip | Every 8 to 10 inches, and 1 to 3 inches from board ends | Common solid-hardwood guidance |
| Fastener length, 3/4-inch solid over 3/4-inch wood subfloor | 2-inch cleat or staple minimum | Mullican nail-down guide |
| Wood subfloor moisture | 12% or less, within 2 to 3 points of the flooring | Hartco solid and engineered guides |
| Subfloor flatness | 3/16 inch in 10 feet or 1/8 inch in 6 feet | Hartco solid guide |
| End-joint stagger | At least 4 inches (one engineered system); 6 inches or more is common for solid | Mullican staple-down guide |
For deeper industry guidance, homeowners and installers can consult the National Wood Flooring Association (NWFA) Technical Guidelines, which cover installation, moisture, jobsite evaluation, climate, sanding, and troubleshooting. Most brands also publish SKU-specific documents, such as the Bruce hardwood specifications and installation guides.
Step 2: Make Sure the Room Is Ready for Hardwood
Don’t install hardwood while the building is still drying out. Roofing, windows, and exterior doors should be finished, and wet work such as drywall mud, plaster, paint, and concrete should be fully dry.
The home’s heating and air conditioning should be running so the room is close to the conditions it will have once people live there. Many manufacturers require this for several days before installation; Hartco’s engineered guide, for example, calls for 60 to 80°F and 30 to 50 percent relative humidity for 14 days before, during, and after installation.
This matters because wood constantly exchanges moisture with the air. Flooring installed in a damp construction site will shrink and gap when the house dries out. Very dry wood installed in a humid room can swell and cup.
Climate also varies a lot across the United States. Homes in the humid Southeast and along the Gulf Coast can run at high indoor humidity all summer, while homes in the desert Southwest, the Mountain West, and cold northern states can drop to very low humidity when the heat runs in winter. Plan for the year-round indoor environment, not the weather on installation day, and budget for a humidifier or dehumidifier if your home regularly moves outside the flooring’s warranty range. The EPA’s guide to controlling moisture in your home covers common sources such as crawl spaces, leaks, and poor ventilation.
Step 3: Remove Trim, Furniture, and Old Flooring
Clear the room completely. Then carefully remove base shoe or quarter-round, baseboards where necessary, existing transitions, and door thresholds where required. Label each piece of trim on the back so it goes back in the same place.
If you’re removing carpet, cut it into 3-foot strips and roll them up, then remove the pad. Pull up the tack strips with a pry bar (wear gloves; the nails are sharp) and pull or drive flush every leftover staple. A single proud staple can create a bump or squeak in the new floor.
Check heights before you commit. New hardwood can raise the floor enough to affect doors, dishwashers, and transitions to adjacent rooms.
Older homes: watch for lead paint and asbestos
Lead paint: If your home was built before 1978, painted baseboards, casings, and door jambs may contain lead-based paint. Prying, cutting, and sanding them can create hazardous lead dust. Follow the EPA’s lead-safe practices for do-it-yourselfers or hire a lead-safe certified contractor.
Asbestos: Older sheet vinyl, vinyl or asphalt tiles, their backing, and black asphaltic (cutback) adhesive may contain asbestos. Don’t sand, grind, or aggressively scrape suspect materials. OSHA’s construction asbestos standard specifically prohibits sanding asbestos-containing flooring, and the EPA advises homeowners to have suspect materials tested and handled by trained professionals before a renovation disturbs them. See the EPA’s guide to protecting your family from asbestos.
Step 4: Inspect and Repair the Subfloor
A beautiful hardwood floor can’t make up for a poor subfloor. It needs to be clean, dry, flat, structurally sound, and rigid enough for the flooring system.
Walk the whole room. Listen for squeaks, feel for movement, and look for damaged panels, protruding fasteners, water stains, and humps or dips. Then fix what you find:
- Screw down loose plywood or OSB into the joists.
- Repair squeaking sections.
- Replace rotten, swollen, or delaminated panels.
- Remove debris and set or pull protruding fasteners.
- Sand down high spots and fill low spots with a patch or leveler approved for your installation method.
- Recheck the floor with a long straightedge.
Subfloor thickness and joist spacing
Panel thickness matters as much as condition. Hartco’s engineered guide, for example, lists 3/4-inch plywood as preferred with 5/8-inch as the minimum, and 23/32-inch tongue-and-groove OSB as the minimum OSB panel. Wider joist spacing, such as 19.2 or 24 inches on center, usually calls for a thicker subfloor or an added layer. Check your product’s requirements and your local building code before installing over an existing floor structure.
Flatness requirements are just as specific. Hartco’s 3/4-inch solid hardwood guide calls for a subfloor within 3/16 inch over 10 feet or 1/8 inch over 6 feet. Treat that as an example of how demanding hardwood can be, and use your own manufacturer’s tolerance.
Flat does not mean level
A room can slope slightly from one side to the other and still be a good surface for hardwood. Problems come from localized humps, dips, abrupt height changes, loose panels, and bounce between joists. Your goal is a smooth, continuous plane that meets the manufacturer’s flatness tolerance.
Step 5: Test for Moisture Before Installing Anything
Moisture testing is often the difference between a floor that lasts decades and an expensive replacement.
Use a wood moisture meter to test both the flooring and the wood subfloor in several spots across the room, and write the readings down. Hartco’s guides, for example, set a 12 percent maximum for the wood subfloor and allow no more than a 3-point difference between subfloor and flooring for narrow strip flooring, tightening to 2 points for wider plank.
For concrete, use the test method the flooring and adhesive manufacturers require. Common methods include ASTM F2170 in-situ relative humidity testing and ASTM F1869 calcium chloride testing. A slab that looks dry can still release enough moisture to ruin a floor, so don’t rely on appearance, and don’t borrow a moisture limit from another brand.
Follow this order: flooring instructions, then adhesive or moisture-system instructions, then the required test, then the actual reading, then install only if the reading passes.
If a reading fails, find the cause before covering the floor. The fix might be more drying time, repairing a leak, improving crawl-space moisture control, correcting drainage, or using an approved moisture-mitigation system.
Step 6: Acclimate the Hardwood (If the Manufacturer Requires It)
You’ll often hear that hardwood should sit in the room for 72 hours. That’s an oversimplification. Acclimation requirements vary widely between products.
Hartco says one of its engineered floors needs no conventional time-based acclimation, only storage in the conditioned space. Mullican calls for at least 48 hours before floating its engineered flooring, and its nail-down guide gives three to five days as an example for solid oak, noting that other species can take longer.
The real goal is to bring the flooring to the right moisture content for your home and your subfloor, not to wait a set number of hours. Check the carton and the current installation guide, and confirm with your moisture meter.
Step 7: Decide Which Direction the Hardwood Should Run
Many homeowners like boards running along the room’s longest sight line because it looks clean and makes the space feel larger. Structure should come first, though.
When hardwood is nailed or stapled over a joisted wood floor, it’s usually installed perpendicular to the floor joists. Running boards parallel to the joists may require extra subfloor reinforcement, such as an added layer of plywood. Settle the structural requirement first, then choose the best-looking option that meets it.
Step 8: Plan the First and Last Rows
Never start against a wall and hope everything works out on the other side. Walls are rarely perfectly straight or square.
Measure the room’s width at several points and calculate how many rows will fit. If the math leaves a very thin final row, rip some width off the first row so both sides look balanced.
Snap a straight chalk line as your reference. That line, not the wall, controls the installation.
Before you fasten anything, also plan how you’ll handle doorways, closets, floor vents, columns, hearths, cabinets, stair openings, and transitions to other flooring. Solving these on paper saves far more time than solving them row by row.
Step 9: Rack Out Boards From Several Cartons
Real wood varies in color, grain, and character. If you finish one carton before opening the next, you can end up with obvious light and dark patches.
Instead, rack the boards: open several cartons at once and lay out a few rows loosely ahead of where you’re working. This lets you spread lighter, darker, and high-character boards across the room, and set aside damaged or badly bowed boards for closets or short cuts.
Vary the board lengths and stagger the end joints. Avoid stair-step patterns and “H” patterns where joints line up every other row. Mullican’s staple-down guide, for example, requires at least 4 inches between adjacent end joints; many installers aim for 6 inches or more on solid strip flooring. Use your product’s minimum.
Step 10: Leave the Correct Expansion Space
Hardwood expands and contracts as humidity changes, so it needs room to move around walls and other fixed objects.
The required gap depends on the product, plank size, installation method, room size, and expected conditions. Mullican’s floating instructions, for example, set the gap equal to the flooring’s thickness, while its 3/4-inch nail-down guidance discusses a 3/4-inch gap in large or humid rooms.
Use the spacers the manufacturer specifies, and keep the gap around walls, columns, pipes, door frames, hearths, and any other fixed vertical obstruction. Don’t borrow a gap size from a laminate or vinyl project. Baseboard and shoe molding will hide the gap once the floor is finished.
Step 11: Undercut Door Jambs and Casings
Cutting a plank to fit around every curve of a door casing rarely looks clean. It’s much better to slide the flooring underneath the casing.
Lay a scrap piece of flooring (on top of any underlayment you’re using) next to the casing. Rest a jamb saw or oscillating multi-tool on the scrap and cut through the casing at that height. Remove the cut piece and vacuum out the dust.
The flooring can now slide under the casing. Keep the hidden expansion gap behind it, and don’t wedge the board tightly against the framing.
Step 12: Install the Hardwood Using the Approved Method
Now the actual installation begins. There are four main methods; follow the one your flooring manufacturer approves for your subfloor.
Method 1: How to Install Solid Hardwood Flooring (Nail-Down)
Nailing, or cleating, is the traditional method for 3/4-inch solid tongue-and-groove hardwood over a wood subfloor.
Lay the vapor retarder first if required. Many manufacturers and the NWFA call for a vapor retarder over wood subfloors, such as asphalt-saturated kraft paper or 15-lb felt, especially over crawl spaces. Roll it out and overlap the seams as your product specifies.
Set the first row. Place the first board along your reference line with the groove facing the wall and the required expansion gap at the wall. A flooring nailer can’t operate tight against the wall, so the first one or two rows are face-nailed with a finish nailer where the baseboard will later hide the nails. Pre-drill face-nail holes in hard species to prevent splitting, and set the nail heads just below the surface with a nail set.
Switch to blind nailing. Once you have enough room for the flooring nailer, fasten through the tongue at the angle the manufacturer specifies. Then:
- Seat each board tightly with the nailer’s mallet or a tapping block without crushing the tongue.
- Follow the specified fastener length and spacing (commonly every 8 to 10 inches for solid strip, and 1 to 3 inches from each board end).
- Stagger end joints and mix lengths and colors as you go.
- Measure back to your reference line every few rows. Small alignment errors grow across a room.
Finish near the far wall. When the flooring nailer runs out of clearance again, switch back to a finish nailer, then face-nail the last rows where trim will cover the holes.
Method 2: How to Staple Down Engineered Hardwood
Staple-down installation follows the same workflow as nail-down, but uses a flooring stapler instead of a cleat nailer. It’s common with manufacturer-approved engineered hardwood over wood subfloors.
Before you start, test the stapler and compressor pressure on scrap flooring. The staple should seat cleanly without splitting the tongue, crushing the edge, damaging the surface, or sitting high enough to block the next board. Recheck the setting occasionally as the compressor cycles.
Don’t assume one staple works for every engineered plank. Mullican’s current instructions, for example, call for different fasteners for 3/8- and 1/2-inch products than for 9/16- and 5/8-inch products.
Wide planks need extra attention. Some manufacturers require glue-assist, a bead of adhesive in addition to the staples, on boards above a certain width. Hartco’s engineered guide requires it on planks wider than 5 inches for its referenced system.
Method 3: How to Glue Down Hardwood Flooring
Glue-down installation is commonly used for approved engineered hardwood over concrete or another suitable substrate. The adhesive can only perform as well as the surface under it, so preparation is critical.
Before opening the adhesive:
- Confirm the substrate is flat, clean, and sound.
- Complete the required concrete moisture test and record the results.
- Remove paint, sealers, curing compounds, and other contaminants the adhesive isn’t approved for.
- Check whether a primer or moisture-control system is required.
- Confirm the adhesive is approved for your flooring, and use the exact trowel notch specified.
Snap working lines so you can spread adhesive in sections without losing your layout reference or kneeling in wet glue. Spread only as much as you can cover within the adhesive’s open time.
Set the boards into the adhesive, engage the tongue and groove with minimal sliding, and keep the perimeter gap open. Lift a board occasionally to check adhesive transfer against the percentage the adhesive maker requires.
Clean any adhesive off prefinished surfaces immediately with the approved cleaner. Once it cures, it can be impossible to remove without damaging the finish. Respect the adhesive’s cure times before allowing traffic or moving furniture.
Method 4: How to Install Floating Engineered Hardwood
A floating floor isn’t nailed or glued to the subfloor. The planks lock or glue to each other and rest on top of an underlayment as one connected surface.
Start with the approved underlayment or vapor-control layer. Thicker padding isn’t better: underlayment that’s too soft or thick lets the locking joints flex and fail. Mullican, for example, limits its floating system to foam no thicker than 1/8 inch.
Depending on the system, boards may click, angle-lock, or tap together, or use glue in a traditional tongue-and-groove joint. Follow the joint design instead of forcing boards, and use a tapping block and pull bar rather than hitting the plank edge directly.
Most importantly, never pin a floating floor in place. Nails through the field, tight trim, heavy fixed cabinetry installed on top, or too little expansion space can stop the floor from moving and lead to buckling or joint separation.
For first-time DIYers, an approved prefinished click-lock floating floor is usually the most manageable hardwood installation, because it removes pneumatic fastening and full-spread adhesive from the job.
Working around vents, pipes, and doorways
Floor vents: Install boards up to and across the vent opening, then mark and cut the opening with a jigsaw. A flush-mount vent register designed for hardwood gives the cleanest result. Never cover or narrow a supply or return vent.
Pipes: Mark the pipe’s center on the board and drill a hole slightly larger than the pipe to preserve the expansion gap. Cut the board through the center of the hole, install it around the pipe, and glue the cut-off piece back in behind. A pipe collar will cover the gap.
Changing direction: In hallways, closets, and doorways where you need to lay boards in both directions from your starting line, glue a spline (also called a slip tongue) into the groove of a board. This turns it into a double-tongue board, so you can install the next rows in the opposite direction.
Step 13: Install the Final Row
Measure the remaining space at several points along the wall and subtract the required expansion gap. Rip the final boards lengthwise to width; the space often tapers, so cut each board to its own measurement.
Use a pull bar to draw the last row tight where a tapping block won’t fit. For nailed and stapled floors, face-nail the final rows close enough to the wall that the baseboard or shoe molding will cover the holes.
Step 14: Add Transitions, Reinstall Trim, and Inspect the Floor
Transitions aren’t just decorative. They manage changes in floor height, floor type, and movement. Common hardwood transitions include:
- T-molding: joins two floors of about the same height.
- Reducer: steps hardwood down to a lower floor, such as vinyl or tile.
- Threshold or end cap: finishes hardwood at sliding doors, exterior doors, or carpet.
- Stair nose: finishes the exposed edge of a stair tread or landing.
- Baseboard, quarter-round, or shoe molding: covers the perimeter expansion gap.
Remove all spacers, then reinstall the baseboard and shoe molding. Nail trim into the wall, not down into the floor, so the flooring can still move. This is especially important for floating floors.
Fill any visible face-nail holes with color-matched wood putty. Vacuum thoroughly, then inspect the floor under low, angled light for damaged boards, proud fasteners, open joints, or adhesive residue.
Nailed, stapled, and floating prefinished floors can usually take light foot traffic right away. For glue-down floors, wait for the cure time listed by the adhesive manufacturer before walking on the floor or moving furniture back. Put felt pads on furniture legs before returning them to the room.
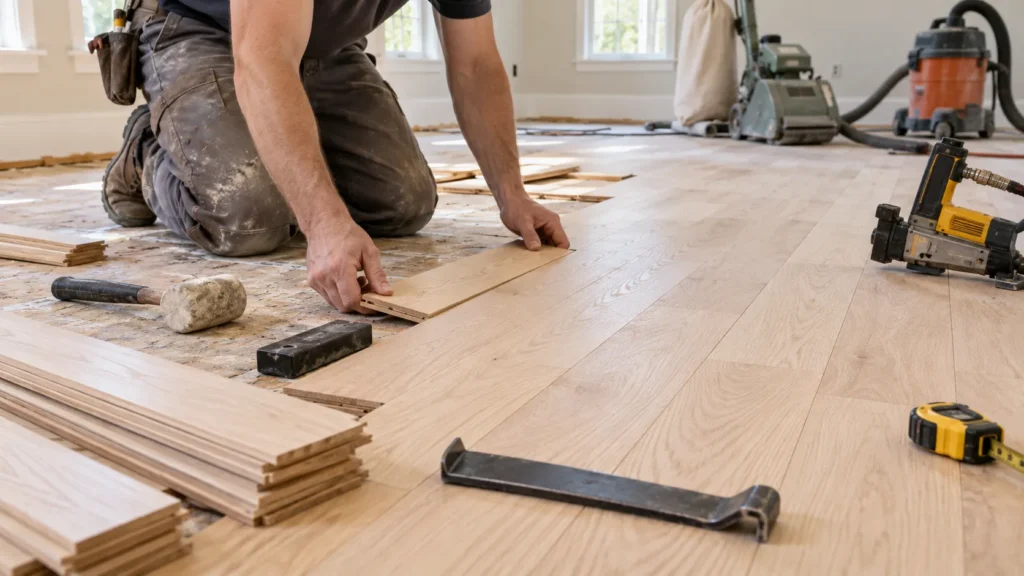
What If You Are Installing Unfinished Hardwood?
With unfinished hardwood, installing the boards is only the first half of the job. The floor then needs to be:
- Flattened with a drum or belt floor sander
- Edge-sanded around the perimeter
- Filled or repaired where needed
- Sanded through progressively finer grits
- Detailed in corners and along transitions
- Vacuumed thoroughly and inspected under strong, angled light
- Stained or sealed if required
Coated with a compatible finish system from a single manufacturer
The right grit sequence depends on the species, how flat the floor is, the stain, and the finish system, so don’t copy one from another project. The NWFA publishes separate Sand and Finish Guidelines because floor finishing is a specialty skill of its own.
A large unfinished floor, a dark stain, or a highly visible open-plan space is exactly where hiring a professional finisher can prevent very expensive mistakes.
Can You Install Hardwood Flooring Over Concrete?
Yes, but usually with engineered hardwood that is specifically approved for concrete. The two common methods are glue-down and floating installation.
Don’t nail directly into a concrete slab. Solid hardwood over concrete requires a special approved assembly, such as a plywood subfloor system installed over the slab. Always test slab moisture first, since a slab can look dry while still releasing enough moisture to exceed the flooring’s or adhesive’s limits.
Can You Install Hardwood Flooring in a Basement?
Start with an engineered hardwood product that is explicitly rated for below-grade installation. Traditional solid hardwood is typically limited to on-grade and above-grade rooms.
Engineered doesn’t automatically mean basement-approved. The product instructions still need to approve the below-grade location, your specific slab or subfloor, your moisture readings, and your chosen installation method.
What About Kitchens, Bathrooms, and Radiant Heat?
In kitchens, bathrooms, and rooms with radiant heat, the exact product matters more than any general hardwood rule.
Engineered hardwood is more dimensionally stable than solid wood when humidity and temperature change, but it is still real wood and it is not waterproof. Some engineered floors approved for basements are specifically excluded from full bathrooms. In kitchens, fix appliance and sink leaks promptly, because standing water can damage any hardwood.
Radiant heat is also decided product by product. Some engineered floors allow it with temperature limits, while some solid hardwood products prohibit it entirely. Never drive a fastener until you know exactly where radiant tubing or heating elements run.
Common Mistakes When You Install Hardwood Flooring
Most installation failures trace back to a short list of avoidable errors:
- Installing on schedule instead of on moisture readings. If the numbers don’t pass, the floor isn’t ready.
- Starting against the wall instead of a reference line. Crooked walls lead to crooked rows and tapered final boards.
- Using the wrong fastener or air pressure. Split tongues and proud staples weaken the floor and block the next board.
- Skipping the expansion gap or pinning a floating floor. Tight trim, cabinets, or nails through a floating floor can cause buckling.
- Working from one carton at a time. This creates visible color patches and repeated joint patterns.
- Spreading too much adhesive. Glue that skins over before boards are set leaves hollow, loose spots.
- Leaving adhesive on a prefinished surface. Once it cures, it can permanently damage the finish.
- Not checking alignment. Measure back to the reference line every few rows before small errors grow.
- Adding thick padding under a floating floor. Extra cushion flexes the joints until they separate.
How Long Does Hardwood Flooring Installation Take?
Room shape and installation method matter almost as much as square footage. These figures are planning estimates, not promises:
| Floor area | Floating (competent DIYer) | Nail/staple (competent DIYer) | Prefinished (professional crew) |
| 100 sq. ft. | About 1 working day | About 1 to 2 days | About half a day to 1 day |
| 250 sq. ft. | About 1 to 2 days | About 2 to 3 days | About 1 day |
| 500 sq. ft. | About 2 to 4 days | About 3 to 5 days | About 1 to 2 days |
Stairs, multiple connected rooms, irregular walls, patterns, tricky transitions, and subfloor repairs can add significant time.
For unfinished flooring, plan on roughly three to five extra days for sanding, staining, coating, and drying. Dark stains and slow-curing finishes can take longer. Acclimation and jobsite conditioning happen before installation and can extend the overall calendar further.
Should You Install Hardwood Flooring Yourself?
A DIY hardwood installation is most realistic when you have a simple rectangular room, a dry and solid subfloor that needs little flattening, prefinished flooring (ideally a floating engineered system), simple doorways, and no stairs, patterns, or moisture problems.
The difficulty rises sharply with nail-down wide planks, full-spread adhesive, concrete moisture mitigation, radiant heat, stairs, herringbone or chevron patterns, several connected rooms, and unfinished hardwood that needs site sanding.
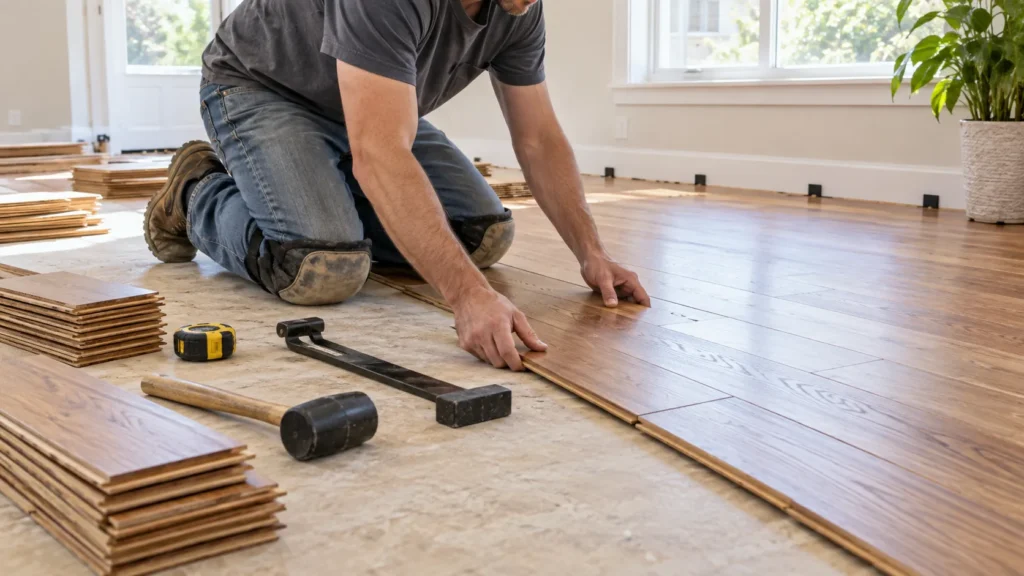
Professional help is especially worth it when:
- Moisture tests fail, or you can’t find the moisture source.
- A concrete slab needs moisture mitigation.
- The subfloor needs structural repairs.
- Radiant tubing is present.
- You’re installing expensive wide-plank flooring.
- Stairs are involved.
- You want a site-applied dark stain.
- The flooring warranty requires professional installation.
A practical middle ground: handle demolition, trim removal, and room prep yourself, then hire a specialist for moisture diagnostics, major subfloor correction, or site sanding and finishing.
Frequently Asked Questions About Installing Hardwood Flooring
What is the easiest hardwood flooring to install yourself?
For most first-time DIYers, a manufacturer-approved prefinished click-lock engineered hardwood installed as a floating floor is the easiest option. It avoids pneumatic nailers and full-spread adhesive, although subfloor flatness, moisture testing, and expansion gaps still apply. If you’re still comparing products, see our breakdown of wood flooring types to find one that suits your room and skill level.
Do you need underlayment under hardwood flooring?
Sometimes. Floating engineered floors usually need an approved underlayment or vapor-control layer. Nail-down and staple-down floors often call for a vapor retarder, such as asphalt-saturated kraft paper or 15-lb felt, over a wood subfloor. Glue-down floors follow the adhesive system’s substrate requirements. Use the underlayment specified for your exact product rather than adding padding automatically.
Does hardwood flooring need to acclimate before installation?
Some products do and some don’t. Follow the manufacturer’s instructions and your moisture-meter readings rather than an automatic 48- or 72-hour rule.
How much expansion space does hardwood flooring need?
There is no universal gap. For 3/4-inch solid hardwood, about 1/2 to 3/4 inch is common, while some floating systems set the gap equal to the flooring’s thickness. Use the gap your manufacturer specifies around walls and all fixed obstructions.
How far apart should hardwood flooring nails be?
A common specification for 3/4-inch solid strip flooring is a fastener every 8 to 10 inches, with one 1 to 3 inches from each board end. Wider planks and engineered products often have different requirements, so check your installation guide.
Should hardwood run parallel or perpendicular to floor joists?
Nailed or stapled hardwood is usually installed perpendicular to the floor joists. If you want to run it parallel, check whether your subfloor needs extra reinforcement first.
Can hardwood flooring be installed directly over plywood?
Yes. Many solid and engineered hardwood systems are designed for installation over plywood or OSB subfloors, as long as the subfloor meets the thickness, strength, flatness, and moisture requirements.
Can you install hardwood directly on concrete?
Approved engineered hardwood can often be glued down or floated over a properly prepared concrete slab. Solid hardwood generally needs a special approved assembly, such as a plywood subfloor, rather than being fastened to the concrete.
Can you install hardwood over an uneven floor?
Not until the uneven areas are corrected to the manufacturer’s flatness tolerance. Installing over humps or dips can cause movement, squeaks, joint failure, hollow spots, and visible irregularities.
Where do you start when installing hardwood flooring?
Start with the jobsite and subfloor, not the first plank. Once the floor is confirmed dry, flat, and sound, snap a straight reference line, calculate the first and last row widths, set your expansion gap, and begin the first row along the reference line, usually along the longest straight exterior wall.
Can you walk on new hardwood floors right away?
Nailed, stapled, and floating prefinished floors can usually take light foot traffic immediately. Glue-down floors need the adhesive’s full cure time, and site-finished floors need the finish’s dry and cure times before traffic, rugs, or furniture.
What is the most important step when installing hardwood flooring?
Moisture testing and subfloor preparation. A badly fastened board damages one board, but installing over excess moisture or an unsuitable subfloor can ruin the entire floor.
Final Thoughts
Knowing how to install hardwood flooring is less about the nailer and more about what happens before it: a dry building, a flat and solid subfloor, passing moisture readings, a straight reference line, and the right expansion gap. Get those right, follow your product’s installation guide for the details, and choose the method your manufacturer approves. The result is a floor that stays tight, flat, and quiet for decades.
If a moisture test fails, the subfloor needs structural work, or you’re finishing unfinished wood with a dark stain, bring in a flooring professional for that part of the job. It usually costs far less than replacing a failed floor.